These magnificent baked goods, with their complex layers and compelling flavour, have caught the hearts and taste buds of cake fans all over the planet. Is it complex or challenging to do? When do you finish agonizing over simplifying this Mixture?
You can make this recipe easily. The bearings on the most proficient method are clear. It’s simple cruising.
In this well-disposed guide, we’ll leave on a culinary excursion to find the enchanted behind making these luscious baked goods without any preparation. Whether you’re a carefully prepared pastry specialist or a beginner in the kitchen, butter braid vow to hoist any event with their overwhelming appeal.
A Brief Introduction:
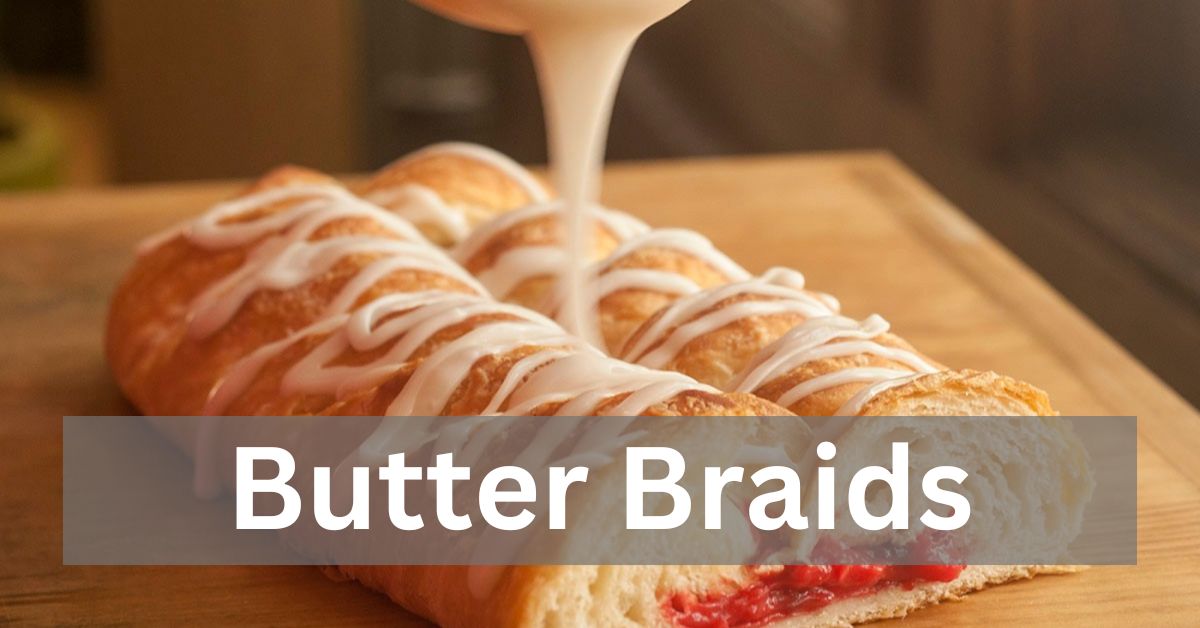
Butter braid, or butter contorts, or kringle, originate from the Scandinavian culinary custom. These superb cakes boast a rich, flaky surface, making them a darling extravagance for breakfast, early lunch, or pastry.
While conventional recipes shift across districts, the substance of butter braids lies in their complicated layers, accomplished through a course of collapsing and curving. The Mixture is improved with butter and sugar.
Ingredients:
To set out on our butter braid experience, we should assemble the fundamental fixings that will change the basic Mixture into glorious enjoyments:
1. Regular flour:
The groundwork of our MixtureMixture, giving design and surface.
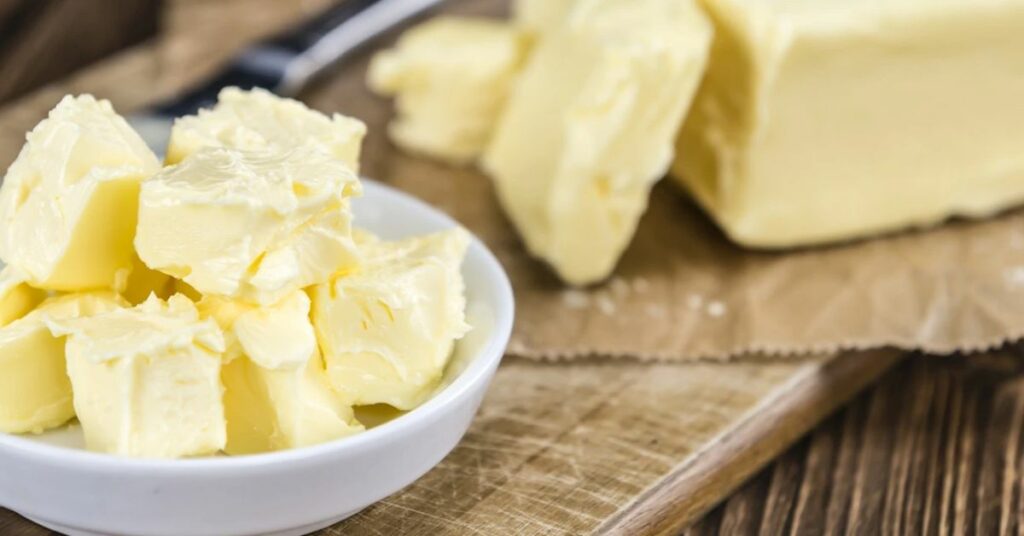
2. butter:
Butter Unsalted, top-notch butter loans lavishness and flavour to our baked goods.
3. Sugar:

Pleasantness to adjust the decadent generosity, making a tremendous difference.
4. Yeast:
Crucial for raising, permitting our MixtureMixture to rise and accomplish a light, breezy surface.
5. Milk:
Adds dampness and generosity to the Mixture, adding to its delicate scrap.
6. Eggs:
Restricting specialists that improve the surface and construction of our cakes.
7. Salt:
Improves the flavour profile, adjusting the pleasantness and wealth of the Mixture mixture.
Read More: Candied Grapes-Complete Guide To Make Good Recipie
Crafting the Dough:
A Beautiful source of both blessing and pain: Now that we’ve collected our fixings, how about we jump into the core of our recipe – creating the ideal braid:
1. Enact the Yeast:
Start by enacting the yeast in warm milk with a spot of sugar. Permit it to sprout until foamy, demonstrating that the yeast is dynamic and prepared to do something unique.
2. Mixing the Ingredients:
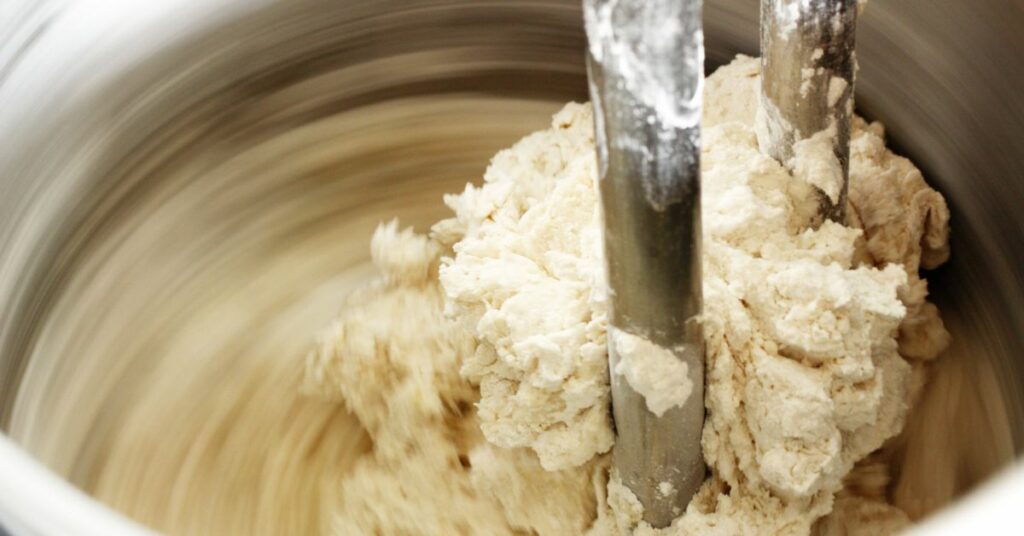
In an enormous blending bowl, combine the flour, sugar, and salt. Steadily integrate the yeast blend, followed by mellowed butter and eggs. Massage the Mixture until it becomes smooth and flexible, a cycle that requires 8-10 minutes the hard way or 5-7 minutes with a stand blender fitted with a battered snare.
3. Rising and Resting:
Spot the in a lubed bowl, cover it with a kitchen towel or cling wrap, and let it rise in a warm, non-draft climate until it multiplies in size. That requires 1-2 hours, contingent upon room temperature and yeast action.
4. Molding the braids:
When the Mixture has risen, punch it down to deliver abundant air and divide it into equivalent parts. Fold each part into a square shape on a floured surface, then butter a liberal layer of relaxed butter and sprinkle with sugar.
Roll up the MixtureMixture firmly into a log and cut it the long way, leaving one end in salvageable shape. Contort the two parts together to shape a mesh, tucking the finishes under to seal.
5. Final Rise and Bake:
Put the moulded batter on a material-lined baking sheet, cover them with a kitchen towel, and let them ascend for 30-45 minutes. Preheat the stove to 350°F (175°C), brush the braid with an egg wash for a brilliant completion, and heat them for 25-30 minutes or until brilliant brown and fragrant.
Variations and Creative braid:
While our exemplary butter braid recipe delights with its immortal appeal, go ahead and your inventiveness and examination with invigorating varieties:
1. Fruit-Filled Delights:
Integrate your favourite organic products, such as apples, berries, or peaches, into the filling for an explosion of newness and flavour.
2. Nutty Extravagances:
Add a sprinkle of hacked nuts, like walnuts or almonds, to the filling for a great crunch and nutty wealth.
3. Wanton Chocolate Whirls:
Fulfil your chocolate desires by twirling liquefied chocolate or Nutella into the braid before moulding the braids, making overpowering chocolatey pockets of goodness.
Read More: Annie Recipes Sweet Amish Pickles-Complete Guide
Technique and Braiding:
Strategy and Meshing are fundamental to setting up a butter braid recipe, guaranteeing the cake’s particular surface and appearance. That is the way to dominate the method:
1. Set up the Mixture:
Begin by making the braid, joining flour, yeast, sugar, salt, milk, butter, and eggs in a bowl. Massage the MixtureMixture until it becomes smooth and flexible, then, at that point, permit it to ascend until multiplied in size.
2. Carry Out the braid:
When the Mixture has risen, punch it down and arrange it in a rectangular shape on a floured surface. The Mixture ought to be about 1/4 inch thick.
3. Butter the Filling:
Set up the filling for the butter braid by consolidating fixings like relaxed butter, sugar, cinnamon, and other desired flavours. Butter the filling uniformly over the braid, leaving a line around the edges.
4. Twist the braid:
To make the mark braid, utilize a sharp blade or pizza shaper to make corner-to-corner cuts along the long sides of the Mixture, leaving the middle piece in one piece. Then, at that point, cautiously crease the segments of MixtureMixture over the filling in a cluttered design, exchanging sides to make a twisted impact.
5. Seal the Closures:
When the braid is twisted, squeeze the finishes together to seal them and keep the filling from spilling out during baking.
6. Sealing and Baking:
Permit the twisted braid to proof briefly, covering it freely with a spotless kitchen towel or cling wrap. Whenever it has multiplied in size once more, brush the top with an egg wash for a brilliant finish, then, at that point, prepare on a preheated stove until brilliant brown and cooked through.
7. Cooling and Serving:
Once heated, allow the butter batter to cool somewhat before cutting and serving. The completed baked good should be flaky, delicate, and loaded with delicious flavours, making it ideal for breakfast, early lunch, or dessert.
Read More: Over Medium Eggs-Tips To Make Delicious Recipie
Faqs:
1. How long do butter braid last?
When kept at 0° F or beneath, the realistic usability timeframe for butter braids items is a half-year from the production date.
2. Are braid super durable?
Meshed styles can remain in your hair for as long as about two months, so if the period of time you can wear the style matters to you, braids are your smartest choice.
3. How would I prepare a butter braid?
Preheat stove to 325°F. Eliminate plastic and heat defrosted baked goods for 22-27 minutes until brilliant brown. Stoves shift, so change time and temperature appropriately.
4. Is it halal to have braids?
Indeed, this is what many individuals think. However, twisting your hair isn’t haram.
Conclusion:
In baking, scarcely any joys rival the fulfilment of making natively constructed treats that enchant the faculties and give pleasure to those we love.
Our cordial manual for butter braid prepares you to embark on a culinary experience with warmth, pleasantness, and the consoling smell of newly heated baked goods.
So focus in, assemble your fixings, and let the enchantment of butter braid transport you to a domain of delighted extravagance. The best minutes are often shared over a warm, flaky baked good created with adoration and care.